
Here's A Simple Tip for Installing an AR-15 Bolt catch!
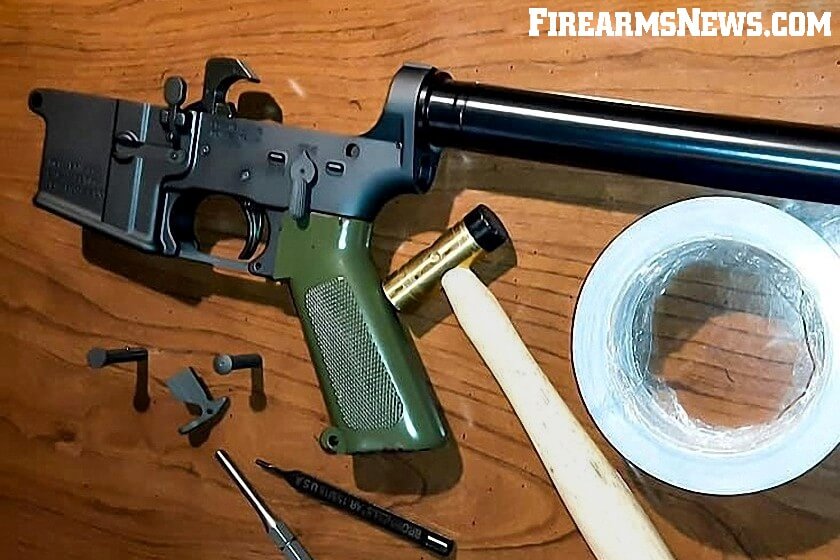
Recently I was installing some proper retro parts in my Colt 601 "Project AGILE" clone. Of these the appropriate original pattern bolt catch is extremely hard to find, even from Mr. Thomas. So I was excited to have one in hand, and wanted to install it properly. While I was at it I figured I would share a little installation tip. Follow along and learn how to protect the finish of your AR-15 lower receiver while you are installing an AR-15 bolt release.
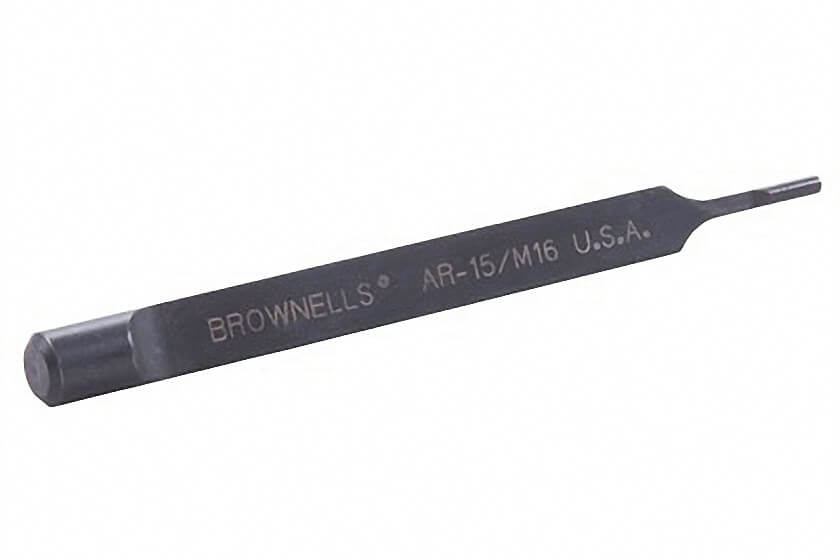
First off I highly recommend you start off by using the proper tools. The use of proper tools will not only make the job easier, but also help install parts properly and to proper spec. In this case you will need to seat a 3/32x1/2 roll pin to retain the bolt catch. While almost any roll pin punch can be used, I use the job-specific roll pin punch from Brownells. This slab-sided punch is specifically made for this application. The body of the punch is machined to provide clearance so it can be used to either install or drive out the roll pin. This is Brownells Part Number 080-216-012WB which is priced at $15.99. I also use Grace roll pin starter punches as well. The 3/32-inch starter punch is available individually from Brownells for $6.99.
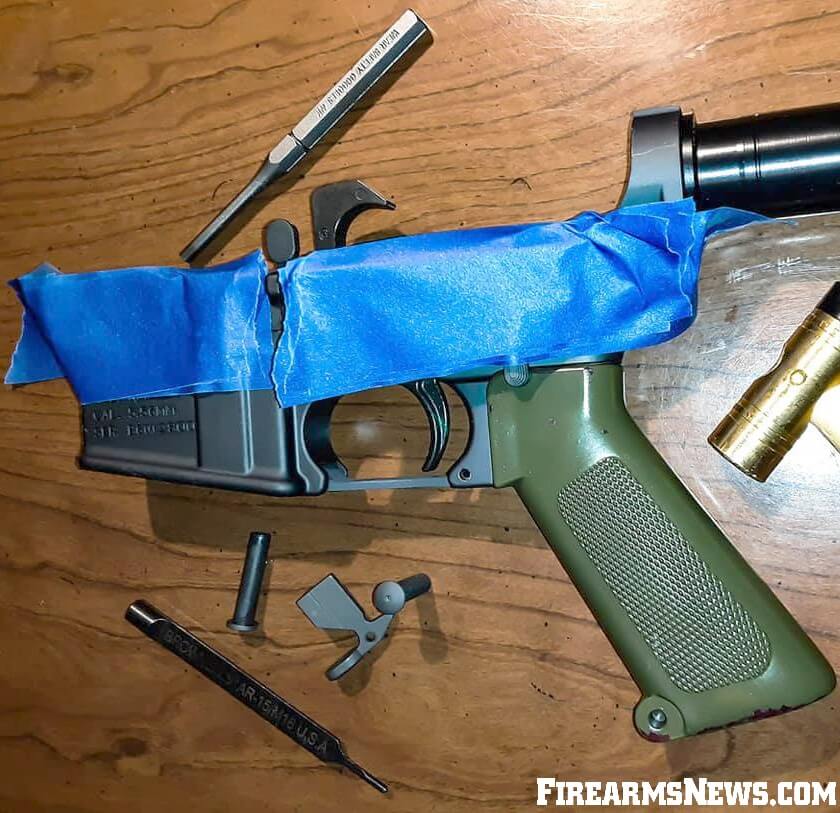
Before you start hammering in your pin though, remember one mistake and the punch can come in contact with the aluminum lower receiver. This will cause a blemish in the finish. While some may not care, others will agree a blemish is unsightly, and prefer to keep it from occurring. This is where the blue tape seen in the accompanying photos comes into play.
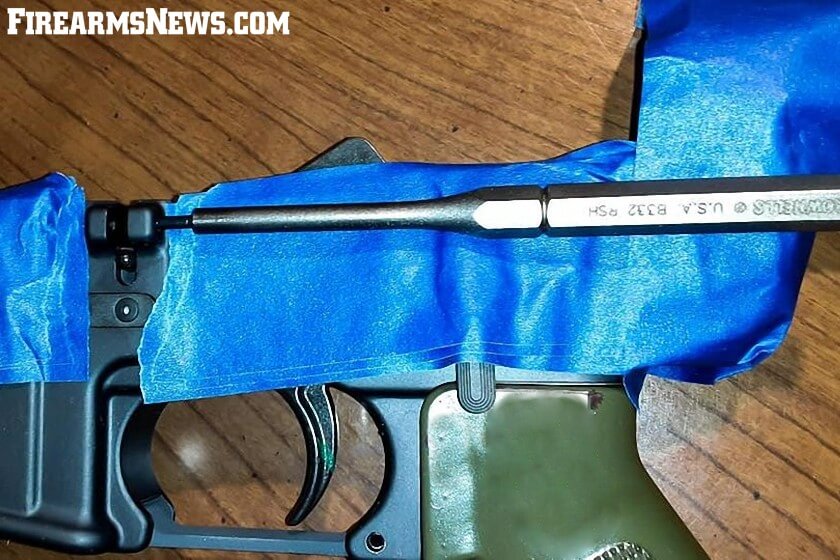
I use three layers of a painter’s tape called "Frog Tape" on my rifles. This sticks fairly well, doesn't leave a residue, peals cleanly once finished and allows for a "buffer" if a mistake should occur (because none of us are perfect), without damage to the finish of the rifle. It also allows for the tools to be placed against the receiver without causing a blemish.
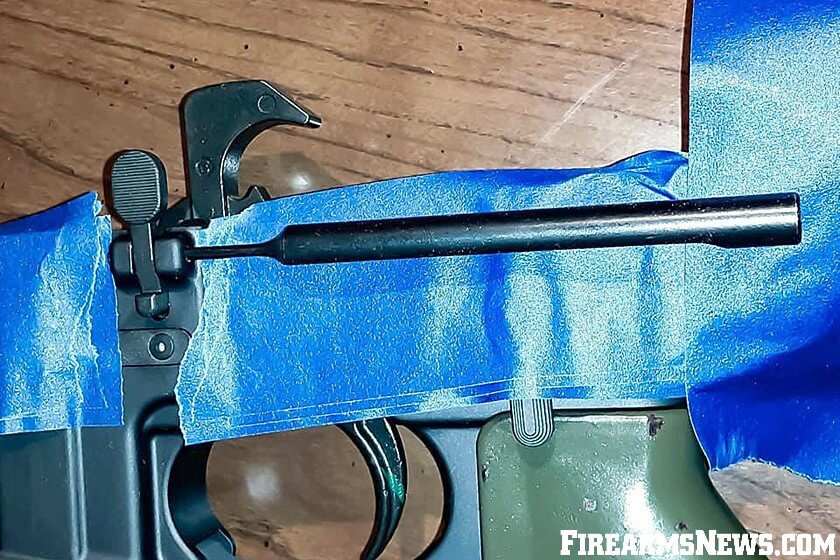
Shown here are several examples demonstrating how simple painter’s tape can save the finish on your rifle. Be it during the building process, changing out parts or upgrading the rifle. This is a great and inexpensive item to keep with your gun smithing tools.
About the Author:
Michelle Hamilton has a Bachelor’s degree in Criminal Justice/Homeland Security, is a serious student of military history, small arms design and manufacturing and is a competitive shooter.